SHOW US WHAT WE'RE WORKING WITH!
You can't make better what you can't measure.
Step 1. Test and Upload Images.
Time for your photoshoot! We’ve put together a quick and easy mobility assessment, specific to running. This simple and effective test will allow Dr. Mitch Broser to assess your baseline mobility, set some goals and see your improvements over the next 8 weeks!
Disclaimer: You could go through the program without this test. You would still have great results, but you wouldn’t be able to see (or brag about) your sweet mobility gains… So get the camera ready! Follow the 5 tests below and submit your photos at the bottom of this page.
PHOTO TAKING TIPS!
IMPORTANT: Wear tight clothing that is a different colour from the background.
- BEST/ EASIEST: Ask someone to take these photos for you.
- ALT: If you’re on your own, thats okay! Take a video of yourself going through the tests and hold each position for 3-5 seconds. Then review the video and take a screenshot of each required photo.
- S.O.S. If none of that makes sense to you, just shoot over an email to mitch@movebetterhp.com.
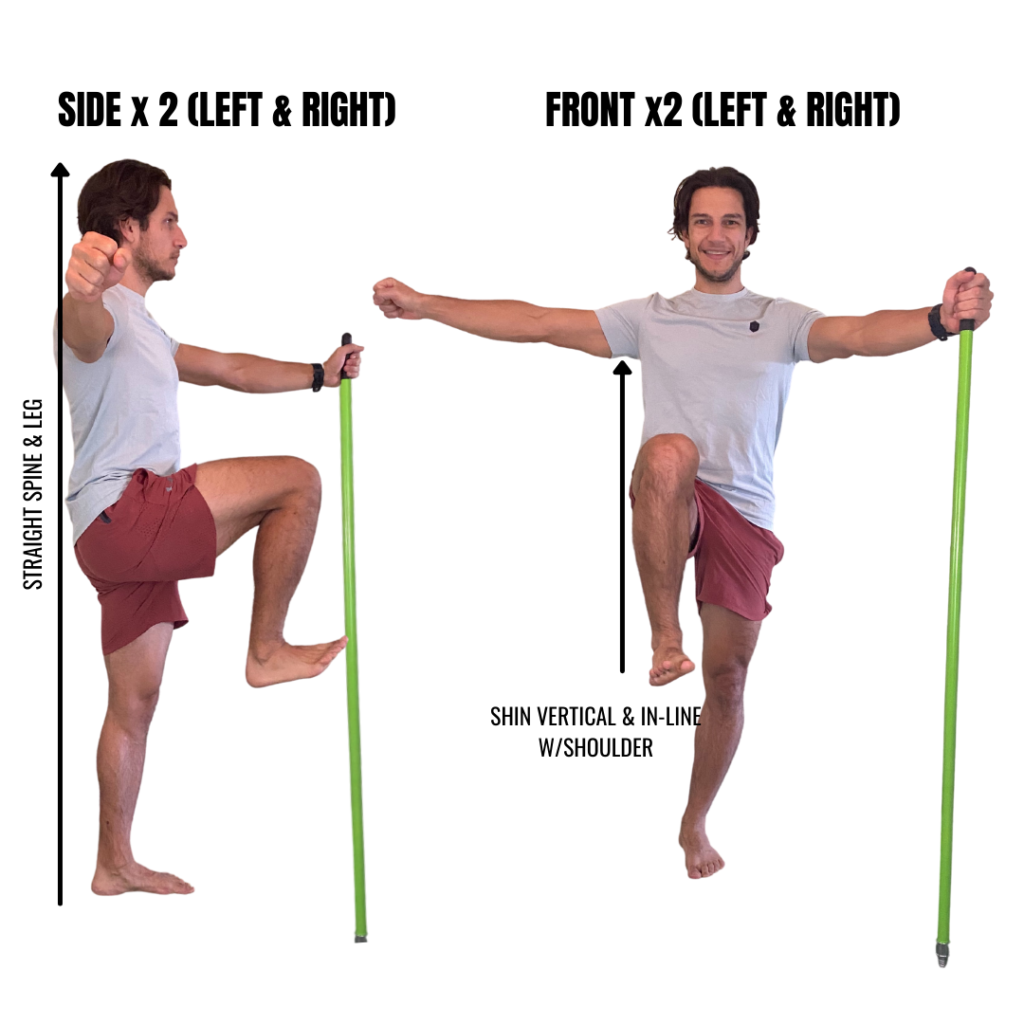
TEST 1. HIP FLEXION

The Movement Test
- Stand tall (“Poke your head through the ceiling”) and hold onto a support for balance.
- Keeping your spine and left (base) leg as straight vertical as possible, actively pull your right knee straight up toward your right shoulder. The shin should be vertical and in-line with the shoulder.
- Snap a pic!
- Repeat Steps 1-3 on the left
The Required Photos
PHOTO(S): Take a photo from the front and side (from the same side as test hip, as shown), with the camera at hip height. 4 photos total.
TEST 2. KNEE FLEXION

The Movement Test
- Hold on to a support, stand tall and keep your knees together.
- Keeping your tailbone tucked and core flexed, bend your right knee and pull your heel to the center of the right butt cheek.
- Snap a pic!
- Repeat steps 1-3 on on the left.
The Photos
PHOTO(S): Take a photo from behind and from the side (same side as test knee, as shown) with the camera at knee height. 4 photos total.
TEST 3. Hamstring Length Test

The Movement Test
- Lie on your back with your fingers (or a dowel) in the space between the floor and your low back.
- Keeping your knee slightly bent and maintaining the space where your fingers are (or dowel), lift your right leg straight up, perpendicular to the floor.
- Snap a pic!
- Repeat Steps 1-3 on the left.
The Photos
PHOTO(S): Take a photo from the same side as your test leg with the camera on the floor. 2 photos total.
TEST 4. ANKLE DORSIFLEXION

The Movement Test
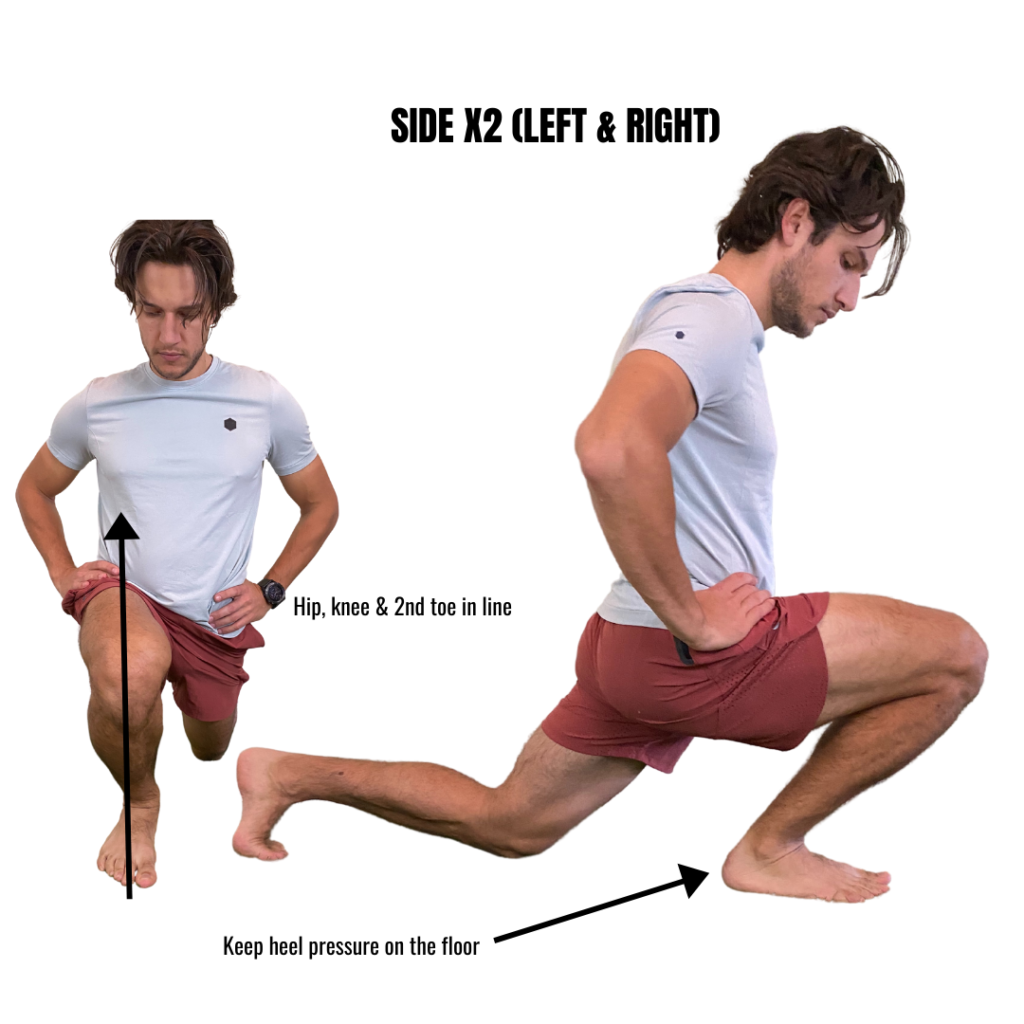
- Start in a half-kneeling position with your right leg in front and equal pressure across your entire right foot.
- Keeping your right hip, knee and 2nd toe in line, shift forward knee until the point before your right heel wants to lift, or the point you feel a pinch in the front of the ankle. If you feel limited by your hips, right your left knee forward.
- Snap a photo!
- Repeat Steps 1-3 on the left.
The Photos
PHOTO(S): Take a photo from side. Take the photo from the same side as your test leg with the camera on the floor. 2 photos total.
TEST 5. BIG TOE DORSIFLEXION

The Movement Test
- Stand tall with a little more pressure on your right leg.
- Without moving the inside of the foot or the 4 small toes, lift you big toe straight up.
- Snap a pic!
- Repeat Steps 1-3 on the left.
The Photos
PHOTO(S): Take a photo from the inside of the foot with the camera on the floor. 2 photos total.
